Never Buy Celery Again – Growing Celery Indoors
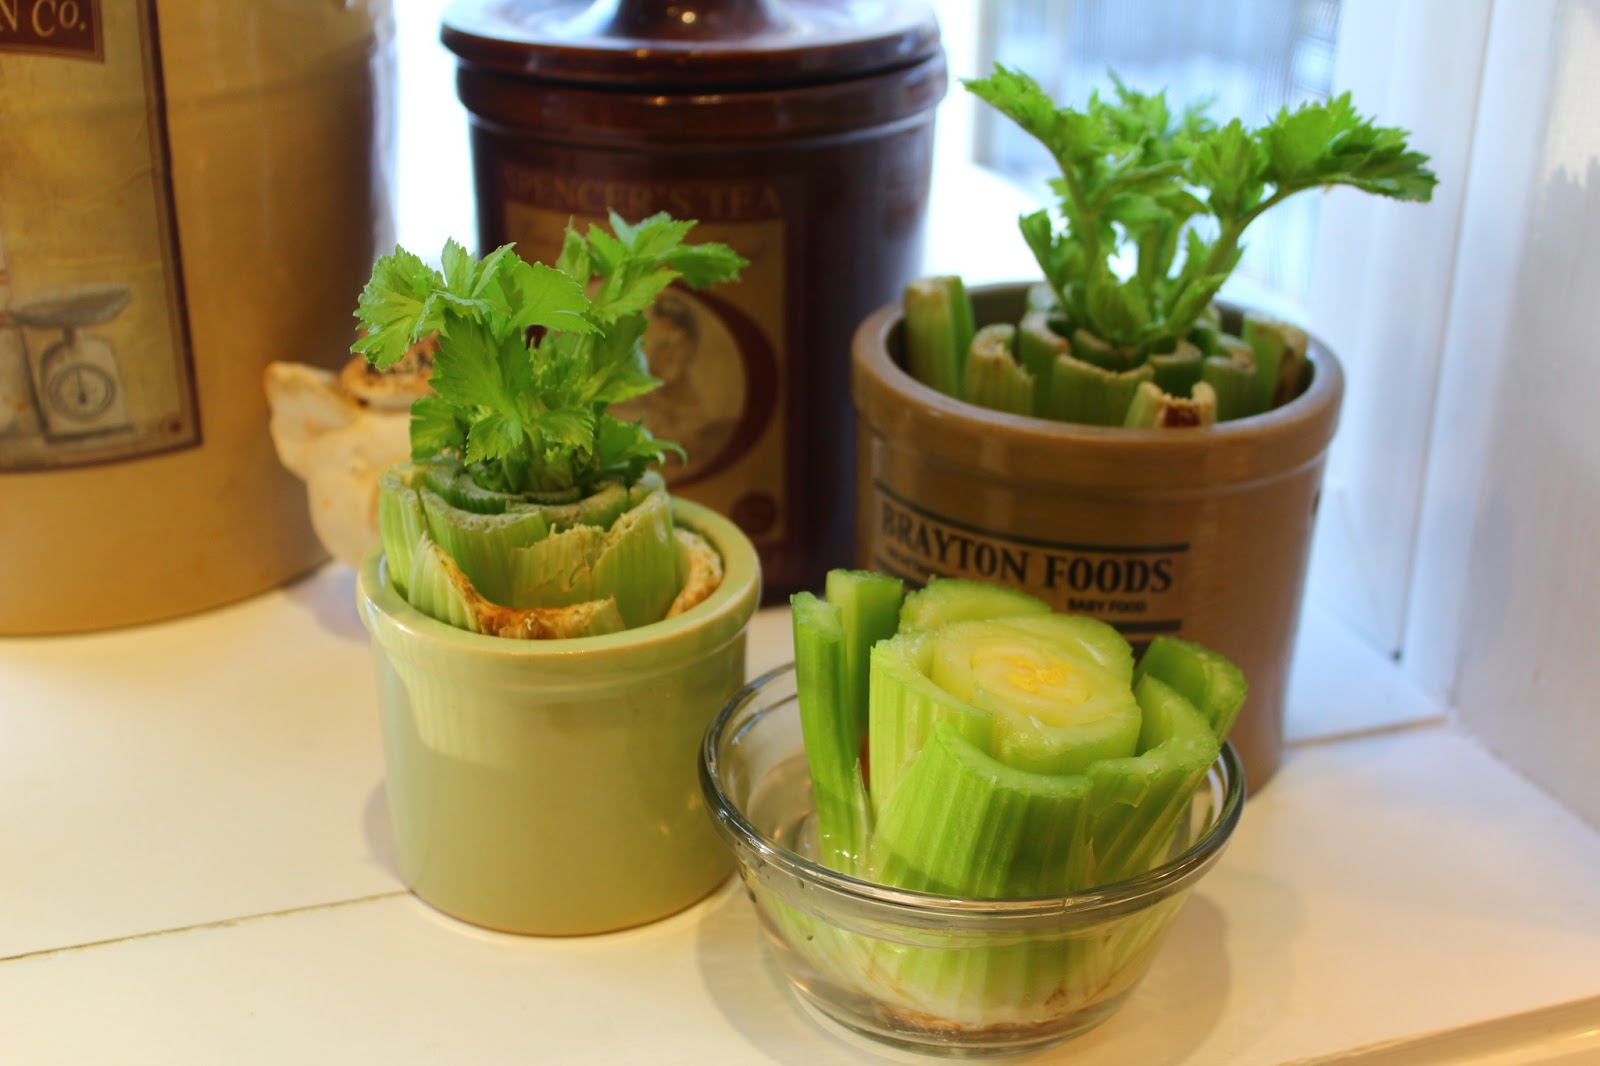
This project is so simple — simply chop the celery stalks from the base of the celery you bought from the store and use as you normally would. Instead of tossing the base, rinse it off and place it in a small saucer or bowl of warm water on or near a sunny windowsill — base side down and cut stalks facing upright.
Let the celery base hang out in the saucer of water for right around one week, give or take. Over the course of the week, the surrounding stalks will start to dry out significantly, but the tiny little yellow leaves from the center of the base will start thickening, growing up and out from the center, and turning a dark green. The growth is slow, but steady and evident.
After the 5-7 days are complete, you can transfer the celery base to a planter and cover it completely save for the leaf tips with a mixture of dirt and potting soil.
Water it generously and after planting in the soil, the overall growth will take off. Not only will you have celery leaves regenerating themselves from the base, but you can see clear stalks making their way up and out. It’s truly fascinating what it can accomplish in just a week.
Tips for growing celery
Change out the water every couple of days while in the “saucer” phase of the project. You can also use a spray bottle to spray water directly onto the base of the celery where the leaves are growing out.
Continue to generously water the celery after planting to keep it thriving.
As planter, you can use a regular tin can. Place a thin layer of mulch at the base to help with drainage, followed by a thick layer of dirt/potting soil mixture. After placing the celery base snugly in the planter, fill the remaining space with more dirt/potting soil to completely cover the celery base. Keep the top to the oats tin and flip it over to place the new planter on top of it — the lid is a perfect custom fit to the base and catches any runoff from regular watering.


